How to use disposable diapers a simple step by step guide walks you through everything you need to know, from choosing the right size to putting the diaper on correctly. You will learn how to prevent leaks, avoid rashes, and change diapers confidently at home or on the go. This easy guide is perfect for new parents, caregivers, and anyone who wants a clear, stress-free way to use disposable diapers.
How to use disposable diapers a simple step by step guide
Learning how to use disposable diapers can feel a bit scary at first, especially if you are a new parent or caregiver. The good news is that with a simple routine and a few helpful tricks, you can master diaper changes very quickly. This guide will show you how to use disposable diapers step by step, in clear and easy language.
You will learn how to choose the right diaper size, how to prepare your space, and how to put on a diaper so it fits well and does not leak. You will also see how to clean your baby’s skin, prevent diaper rash, handle nighttime changes, and deal with messy situations. By the end, you will feel confident every time you reach for a disposable diaper.
Key Takeaways
- Point 1: Choosing the right size and fit is the most important step to prevent leaks and keep your baby comfortable.
- Point 2: Always gather your supplies first so you never leave your baby unattended during a diaper change.
- Point 3: Wiping front to back, letting skin dry, and using cream when needed helps prevent diaper rash.
- Point 4: Correctly placing the diaper, using the waistband line, and securing tabs evenly stops gaps and blowouts.
- Point 5: Dispose of used disposable diapers safely by sealing them well and washing your hands every time.
- Point 6: Nighttime, travel, and newborn changes need a few extra tricks, like boosters, extra pads, and more frequent checks.
- Point 7: A calm, simple routine makes diaper changes easier for you and more relaxing for your baby.
Step 1: Understand the basics of disposable diapers
Before you learn how to use disposable diapers, it helps to know what they are and how they work. A disposable diaper is a single-use diaper made from soft, absorbent materials. It is designed to pull moisture away from your baby’s skin and trap it inside the diaper. After it is used, you throw it away.
Main parts of a disposable diaper
- Outer layer: This is the waterproof outer cover. It keeps moisture inside the diaper and away from clothes.
- Absorbent core: This is the middle layer that soaks up urine and holds it. It usually contains special gel beads that lock in liquid.
- Inner liner: This is the soft layer that touches your baby’s skin. It is designed to feel dry and gentle.
- Leg cuffs: These are the stretchy, ruffled edges around the legs. They help stop leaks.
- Waistband: The stretchy top part that goes around your baby’s tummy and back.
- Tabs or fasteners: These sticky or hook-and-loop strips attach the front of the diaper to the back to keep it in place.
- Wetness indicator (on many brands): A line that changes color when the diaper is wet.
Understanding these parts makes it easier to see how to use disposable diapers correctly and adjust them for a snug, comfortable fit.
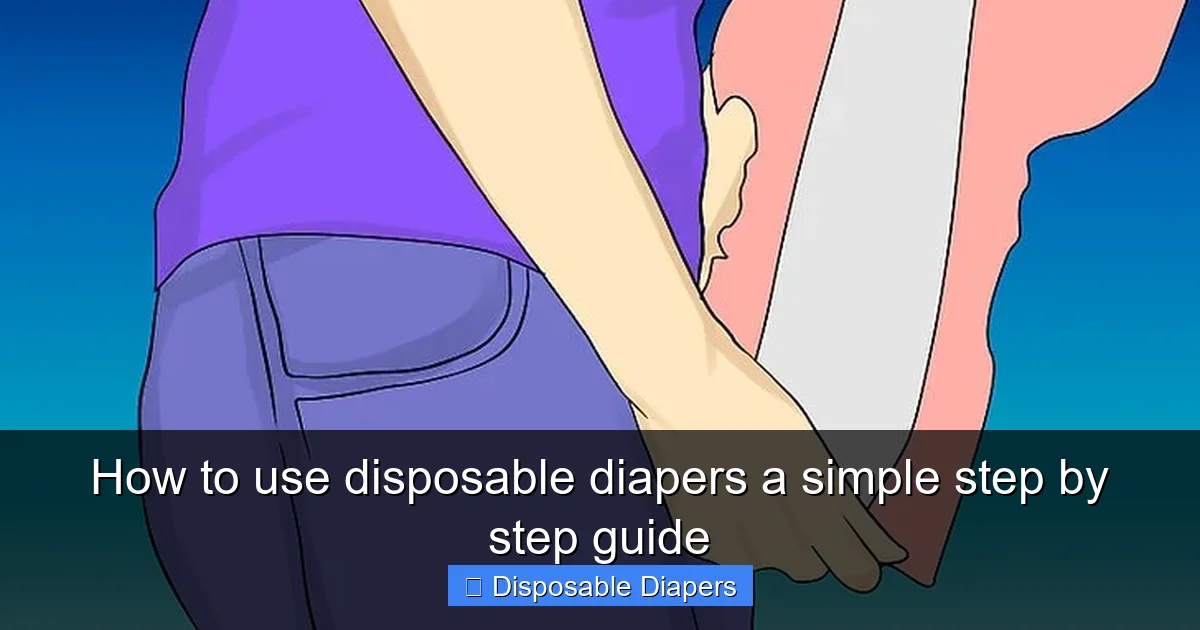
Step 2: Choose the right diaper size and type
One of the most important parts of learning how to use disposable diapers is picking the right size. A diaper that is too small can cause red marks and leaks. A diaper that is too big can sag and let mess escape.
Visual guide about How to use disposable diapers a simple step by step guide
Image source: wikihow.health
How to pick the correct size
- Check the weight range: Every pack of disposable diapers lists a weight range, like “Newborn,” “Size 1: 8–14 lb,” or “Size 3: 16–28 lb.” Use your baby’s current weight to guide you.
- Look at the fit: The diaper should sit just under the belly button, not too high or low. The leg cuffs should hug the thighs without leaving deep red marks.
- Watch for leaks: Frequent leaks at the legs or back may mean you need the next size up, even if your baby is still within the printed weight range.
- Check red marks: Light marks are normal, but deep or lasting marks can mean the diaper is too tight or too small.
Choosing the right type of disposable diaper
- Newborn diapers: These are smaller and sometimes have a cut-out for the umbilical cord stump.
- Standard daytime diapers: Good for regular use. They are thinner and easy for daytime movement.
- Overnight diapers: These are more absorbent and better for long stretches of sleep.
- Sensitive or hypoallergenic diapers: Designed for babies with easily irritated skin. They may be fragrance-free and lotion-free.
- Pull-up style diapers: For older babies and toddlers who are more active or starting potty training.
When you know how to use disposable diapers, you will often switch between daytime and nighttime styles to match your baby’s needs.
Step 3: Gather all your diaper-changing supplies
Never start a diaper change without everything you need. Once your baby is on the changing surface, you should not leave them alone, even for a moment. Having a set place and a routine will make every change faster and easier.
Visual guide about How to use disposable diapers a simple step by step guide
Image source: petfoodnmore.com
Basic supplies you need
- Clean disposable diaper: Always have at least one, but keep extras nearby in case of a big mess.
- Baby wipes or soft washcloths: Use fragrance-free wipes if your baby has sensitive skin.
- Diaper cream or ointment: Zinc oxide or petroleum-based creams protect against diaper rash.
- Changing pad or towel: A waterproof pad or soft towel protects your surface and keeps baby comfy.
- Plastic bag or diaper pail: For throwing away used disposable diapers and wipes.
- Hand sanitizer or soap and water: For cleaning your hands before and after the change.
Nice-to-have extras
- Extra clothes: Keep a spare onesie or outfit nearby for blowouts.
- Distraction toys: A small toy, rattle, or soft book can keep your baby calm and still.
- Changing caddy or basket: A small organizer to hold everything you need in one place.
Setting up your space before you start is one of the simplest ways to make how to use disposable diapers feel easy and stress-free.
Step 4: Prepare your baby and the changing area
Now that you have your supplies, it is time to set up your changing area and get your baby ready. This step helps keep your baby safe and comfortable.

Visual guide about How to use disposable diapers a simple step by step guide
Image source: cdn11.bigcommerce.com
Set up the changing surface
- Choose a flat, stable surface: This can be a changing table, bed, sofa, or floor.
- Lay down a changing pad: Use a waterproof pad or towel to protect the surface and catch any mess.
- Keep one hand on baby: If you are using a higher surface, always keep one hand on your baby to prevent falls.
Get your baby ready
- Lay your baby on their back: Gently place your baby on the pad, with their head supported.
- Unfasten clothing: Open snaps, zippers, or pull pants down to expose the diaper area.
- Talk and soothe: Use a calm voice. Sing, talk, or make eye contact to keep your baby relaxed.
Taking a moment to prepare makes the rest of the process of how to use disposable diapers smoother and safer.
Step 5: Remove the dirty diaper safely
Next, you will remove the used disposable diaper. This part can be messy, but with a simple method, you can keep things clean and under control.
Open the dirty diaper
- Unfasten the tabs: Gently peel open the tabs on each side of the diaper. Fold them back so they do not stick to you or the pad.
- Hold your baby’s ankles: Use one hand to gently lift your baby’s legs by the ankles. Do not pull too high; just enough to slide the diaper down.
- Use the front of the diaper: If there is poop, fold the front of the diaper down and use it to wipe away some of the mess from the skin.
Slide out the dirty diaper
- Slide the diaper out: With your baby’s legs still gently lifted, slide the dirty diaper out from under their bottom.
- Fold it inward: Fold the dirty diaper in on itself, rolling it up to trap the mess inside.
- Secure with tabs: Use the tabs to seal the rolled diaper closed before putting it aside or in the trash.
Once you know how to use disposable diapers, this process becomes quick and natural, even with very messy changes.
Step 6: Clean your baby’s skin properly
Cleaning the diaper area well is just as important as putting on the new disposable diaper. Good cleaning helps prevent rashes and keeps your baby comfortable.
How to wipe correctly
- Always wipe front to back: This is especially important for baby girls to prevent spreading bacteria from the bottom to the front.
- Use gentle strokes: Use soft, gentle wipes, not harsh scrubbing.
- Lift the legs: Gently lift your baby’s legs by the ankles to reach under the bottom and between the folds.
- Use enough wipes: Keep wiping until the skin looks clean. Use a fresh wipe for each big swipe if there is a lot of mess.
Let the skin dry
- Pat, do not rub: If needed, use a clean cloth to pat the area dry.
- Air dry for a moment: Let your baby’s skin air dry for a few seconds. This helps reduce moisture that can cause rash.
Apply diaper cream if needed
- Use a thin layer: Spread a thin layer of diaper cream or ointment on any red or irritated areas.
- Focus on high-friction spots: Around the anus, between buttocks, and where the diaper rubs most.
- Follow your doctor’s advice: If your baby has a strong rash, ask your pediatrician which creams are best.
Good cleaning is a key part of how to use disposable diapers in a healthy, skin-friendly way.
Step 7: Place the clean disposable diaper correctly
Now it is time to slide a fresh disposable diaper under your baby. Getting the position right is important for comfort and leak protection.
Position the diaper under your baby
- Open the diaper fully: Lay the clean diaper flat with the tabs at the back (usually the side with the colorful designs).
- Lift your baby’s legs: Gently lift your baby’s legs by the ankles again.
- Slide the diaper under: Slide the back half of the diaper under your baby’s bottom. The top of the back should line up with your baby’s waist, just above the buttocks.
- Lay your baby down: Gently lower your baby’s legs so they are resting on the diaper.
Pull the front of the diaper up
- Bring the front panel up: Pull the front of the diaper up between your baby’s legs, toward the belly button.
- Check the position: The front top edge should reach about the same height as the back, near the belly button.
- For boys: Point the penis down before closing the diaper to help prevent leaks at the top.
This simple positioning is at the heart of how to use disposable diapers so they fit well and feel comfortable.
Step 8: Fasten the diaper for a snug, leak-free fit
Now you will secure the disposable diaper using the side tabs. A good fit is snug but not too tight.
Secure the side tabs
- Attach one side at a time: Pull the left tab across the front of the diaper and attach it to the landing zone (the strip on the front). Repeat with the right tab.
- Keep it even: Make sure both tabs are at the same angle and height so the diaper sits straight.
- Check the snugness: You should be able to slide one or two fingers between the diaper and your baby’s tummy.
Adjust the leg cuffs
- Pull out the ruffles: Gently run your finger around each leg opening to pull the inner cuffs outward. They should not be tucked inside the diaper.
- Check for gaps: The leg openings should hug the thighs without big spaces, but also without deep marks.
- Check the back: The back of the diaper should sit high enough to catch any poop, especially for newborns.
Learning how to use disposable diapers with the right tightness takes a little practice, but soon you will know by feel when it is just right.
Step 9: Dress your baby and clean up
Once the disposable diaper is on and secure, you can finish the change by dressing your baby and cleaning your space.
Redress your baby
- Pull clothes back into place: Pull up pants or resnap the onesie.
- Check waistband comfort: Make sure the clothing is not pressing the diaper too tightly into your baby’s tummy.
- Keep baby warm: For newborns, cover legs and feet so they do not get cold during changes.
Dispose of the dirty diaper
- Seal it well: Make sure the dirty disposable diaper is rolled and sealed with its tabs.
- Use a trash can or diaper pail: Place the diaper in a lined bin with a lid to control odor.
- Do not flush: Never flush disposable diapers or wipes; they can block pipes.
Wash your hands
- Clean hands every time: Wash with soap and water or use hand sanitizer.
- Clean the changing surface: Wipe down the pad or surface if it got dirty.
This final step is part of a complete routine for how to use disposable diapers in a clean and hygienic way.
Step 10: How often to change disposable diapers
Knowing how to use disposable diapers also means knowing when to change them. Changing often keeps your baby dry and reduces the risk of diaper rash.
General guidelines
- Newborns: Change every 2–3 hours, or as soon as the diaper is wet or dirty. Newborns may need 8–12 changes per day.
- Older babies: Change every 3–4 hours during the day, and after each poop.
- Nighttime: Use more absorbent or overnight disposable diapers and change if the baby wakes and feels very wet or has pooped.
Signs it is time to change
- Wetness indicator: Many diapers have a line that changes color when wet.
- Feeling the diaper: Gently squeeze the front of the diaper. If it feels full or heavy, it is time to change.
- Smell or fussiness: If you notice a smell or your baby seems uncomfortable, check the diaper.
Regular changes are a big part of how to use disposable diapers to keep your baby happy and rash-free.
Special situations: nights, outings, and newborns
Some situations need a few extra tricks. Knowing how to use disposable diapers in these moments can save you stress and extra laundry.
Nighttime diaper tips
- Use overnight diapers: Choose a style made for long wear with extra absorbency.
- Size up at night (sometimes): Some parents use one size larger for bedtime to allow more absorbent material.
- Avoid too much liquid before bed: For older babies, limit large bottles right before sleep if leaks are a problem (when advised by your doctor).
- Check in the night: If your baby wakes, quickly feel the diaper. Change if very wet or dirty.
Outings and travel
- Pack a diaper bag: Include extra disposable diapers, wipes, cream, a changing pad, and spare clothes.
- Use disposable changing pads: These protect public surfaces and can be thrown away after.
- Plan ahead: Try to change your baby right before you leave and again when you arrive.
Newborn care
- Umbilical cord care: Use newborn disposable diapers with a cord cut-out, or fold the front of the diaper down below the stump.
- More frequent changes: Newborns poop often and need more changes to prevent irritation.
- Gentle products: Use mild, fragrance-free wipes or even warm water and cotton pads.
With a bit of planning, you can handle how to use disposable diapers in any setting without worry.
Troubleshooting common diaper problems
Even when you know how to use disposable diapers, you may still run into leaks, rashes, or blowouts. This section will help you fix the most common issues.
Problem: Leaks around the legs or back
Possible causes: Wrong size, loose fit, or leg cuffs tucked in.
- Check if the diaper is the right size for your baby’s weight.
- Make sure the waistband is snug but not too tight.
- Pull the leg cuffs out all the way around the thighs.
- For heavy wetters at night, try more absorbent or overnight disposable diapers.
Problem: Diaper rash
Possible causes: Moisture, friction, or sensitivity to wipes or diapers.
- Change diapers more often to keep the area dry.
- Let your baby have short “diaper-free” time on a towel to air out the skin.
- Use a thick barrier cream at each change until the rash improves.
- Try a different brand of disposable diapers or wipes if irritation continues.
- Call your pediatrician if the rash is severe, blistered, or does not improve in a few days.
Problem: Blowouts up the back
Possible causes: Diaper too small, too loose, or waist sitting too low.
- Move up to the next diaper size if the current one is tight.
- Pull the back of the diaper higher up on your baby’s back.
- Make sure the waistband is snug and tabs are even.
- For frequent blowouts, some parents use a diaper cover or snug onesie to help hold the disposable diaper in place.
Problem: Red marks from the diaper
Possible causes: Diaper too tight, size too small, or clothing pressing on the diaper.
- Loosen the tabs slightly at the next change.
- If red marks are deep or lasting, try a larger diaper size.
- Choose softer, looser clothing around the waist and legs.
Most problems are easy to fix once you understand how to use disposable diapers and what a proper fit looks like.
Helpful tips for easier diaper changes
Here are some extra tips to make learning how to use disposable diapers even smoother.
- Set up a routine: Change diapers at regular times, such as before and after naps, and before bedtime.
- Stay calm: Babies can sense your stress. Talk gently and move slowly.
- Use distraction: Keep a “diaper toy” that your baby only sees during changes to keep them interested.
- Prepare before opening: Open the clean disposable diaper and have it ready before you remove the dirty one.
- Dress smart: Choose clothes with easy snaps or zippers for fast access to the diaper area.
Conclusion
Now you know how to use disposable diapers from start to finish. You have learned how to pick the right size, prepare your space, remove a dirty diaper, clean your baby’s skin, and put on a fresh diaper with a snug, leak-free fit. You also know how to handle special situations like nights, travel, and newborn care, and how to fix common problems.
Like any new skill, learning how to use disposable diapers gets easier with practice. After a few days, the steps will feel natural and quick. Most of all, remember that a clean, dry diaper, gentle care, and a calm, loving touch are what matter most for your baby’s comfort and happiness.
🎥 Related Video: Cloth Diapers: How To Put On a Lighthouse Kids Company Cloth Diaper
📺 Lighthouse Kids Company – Cloth Diapers
Cloth Diapers: How To Put On a Lighthouse Kids Company Cloth Diaper | Complete Fit & Setup Guide Welcome to our video …