This ultimate diaper changing checklist shows you exactly what to do before, during, and after every diaper change. You will learn how to set up your changing area, what supplies you need, and how to keep your baby clean, safe, and comfortable. Use this simple guide to turn messy, stressful changes into quick, calm routines you can handle any time of day or night.
Key Takeaways
- Point 1: A clear diaper changing checklist makes changes faster, safer, and less stressful for parents and babies.
- Point 2: Always gather all disposable diaper supplies before you start, so you never leave baby unattended.
- Point 3: A clean, organized diaper changing station saves time and reduces mess and germs.
- Point 4: Using the right size disposable diaper and proper fit prevents leaks and blowouts.
- Point 5: Gentle cleaning and a simple rash prevention routine keep baby’s skin healthy.
- Point 6: Having a “grab-and-go” travel diaper changing checklist makes outings much easier.
- Point 7: With practice and a solid routine, diaper changing becomes quick, calm, and almost automatic.
Introduction: Why You Need a Diaper Changing Checklist
Diaper changes can feel messy, rushed, and stressful. You are trying to keep your baby safe, clean, and calm, often on very little sleep. A simple diaper changing checklist can turn chaos into a calm routine. It helps you remember every step, every supply, and every safety rule, even when you are tired.
This guide focuses on disposable diapers and walks you through every part of the process. You will learn what to prepare, how to change a diaper step by step, how to prevent leaks and rashes, and how to handle diaper changes on the go. By the end, you will have a complete diaper changing checklist you can follow and adapt to your family’s needs.
Use this guide to build your own routine. The more you follow the same steps, the faster and easier diaper changing becomes. Soon it will feel natural and stress free.
Step 1: Set Up Your Diaper Changing Station
The first part of your diaper changing checklist is your space. A good setup makes every change safer and easier. You can use a changing table, a dresser with a pad, or even a firm mat on the floor. The key is to keep everything close to your hands.
Visual guide about Ultimate diaper changing checklist for stress free parents
Image source: shop.mommoneymap.com
1.1 Choose a Safe Surface
- Use a flat, stable surface: A changing table, bed, or floor works. The floor is safest if you are worried about falls.
- Use a changing pad: A wipeable or waterproof pad protects your surface and keeps baby comfy.
- Have safety straps if elevated: If you use a changing table, always use the strap, but still keep a hand on baby.
1.2 Organize Essential Supplies Within Reach
Your diaper changing checklist starts with supplies. Keep them in one spot so you are never scrambling mid-change.
- Disposable diapers (at least 5–10 in the current size)
- Baby wipes or soft washcloths and warm water
- Diaper cream or ointment
- Diaper rash prevention cream (if different)
- Disposable diaper bags or a small trash can with a lid
- Changing pad covers or extra towels
- A change of baby clothes (onesie, pants, socks)
- Hand sanitizer (for when you cannot wash hands right away)
Store these items in baskets, drawers, or caddies. The goal is simple: once baby is on the pad, you never have to walk away to grab anything.
1.3 Create a Nighttime Setup
Nighttime changes are harder because you are sleepy and the room is dark. Add a small, dim light near your diaper changing station. Keep a stack of disposable diapers, wipes, and a fresh onesie nearby. A small caddy you can move between rooms is very helpful for nighttime and naps.
Step 2: Know Your Diaper Changing Checklist Essentials
Next, let’s break down the key items on your diaper changing checklist and why they matter. This helps you choose the right products and avoid waste and frustration.
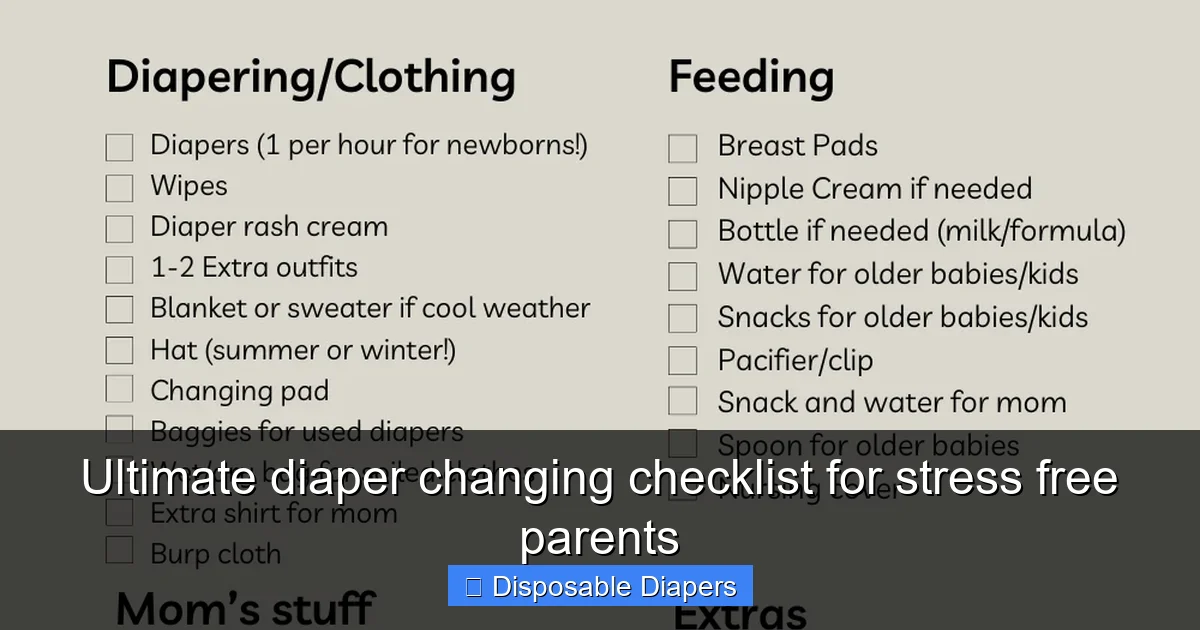
Visual guide about Ultimate diaper changing checklist for stress free parents
Image source: i.pinimg.com
2.1 Disposable Diapers: Size and Fit
Using the right size disposable diaper is one of the best ways to prevent leaks and blowouts.
- Check the weight range: Each diaper package lists a weight range. If your baby is near the top, it may be time to size up.
- Watch for red marks: If the diaper leaves deep red marks on the legs or belly, it may be too tight.
- Check for gaps: Large gaps around the thighs or back can cause leaks.
- Look for a snug but comfy fit: You should be able to slide two fingers gently under the waistband.
2.2 Wipes and Cleaning Supplies
Baby skin is delicate, especially in the diaper area. Choose gentle cleaning options.
- Unscented wipes: These are less likely to irritate skin.
- Sensitive or water-based wipes: Great for newborns and rash-prone skin.
- Washcloths and warm water: A simple, gentle option for very young babies.
Always wipe gently. Too much rubbing can cause irritation, even with soft wipes.
2.3 Creams, Ointments, and Powders
A good diaper changing checklist includes skin protection. You do not need many products, just the right ones.
- Barrier cream or ointment: Use a thin layer to protect skin from moisture and poop.
- Rash cream: Keep a stronger cream on hand for diaper rash flare-ups.
- Powder (optional): If you use powder, keep it away from baby’s face and use very sparingly.
2.4 Disposal Supplies
Dirty diapers need a clean, simple disposal plan.
- Diaper pail with lid: Helps contain smells if you change diapers in the same room often.
- Small trash can with lid: Works well if you empty it often.
- Disposable diaper bags: Great for sealing in smells and for travel or public restrooms.
Step 3: Prepare Before You Start the Diaper Change
One of the most important parts of a diaper changing checklist happens before you even open the diaper. Preparation keeps baby safe and you less stressed.

Visual guide about Ultimate diaper changing checklist for stress free parents
Image source: i.pinimg.com
3.1 Wash or Sanitize Your Hands
Always start with clean hands. Wash with soap and water when you can. If not, use hand sanitizer before the diaper change. This helps protect your baby’s sensitive skin and prevents germs from spreading.
3.2 Gather All Your Supplies
Before you lay your baby down, make sure you have:
- 1–2 clean disposable diapers
- Enough wipes for a messy change
- Diaper cream or ointment
- A clean outfit (just in case)
- A plastic bag or trash can nearby
Place everything within arm’s reach. Once baby is on the changing pad, never leave them alone, even for a second.
3.3 Calm and Distract Your Baby
Talk, sing, or offer a small toy before you start. A calm baby makes diaper changing easier. You can keep a special “diaper toy” at your diaper changing station that baby only gets during changes. This keeps their hands busy and their mood happier.
Step 4: Step-by-Step Diaper Changing Checklist (Disposable Diapers)
Now let’s walk through the full diaper changing checklist step by step. Follow these steps for both wet and dirty diapers, with small changes for each type.
4.1 Lay Baby Down Safely
- Place your baby on their back on the changing pad.
- Use the safety strap if you have one, but always keep one hand near baby.
- Never turn your back or walk away, even if your baby is very young.
4.2 Open the Dirty Diaper
- Unfasten the diaper tabs on each side.
- Gently lift baby’s legs by the ankles with one hand.
- For a wet diaper, fold the front of the diaper down.
- For a dirty diaper, use the front half of the diaper to wipe away some of the poop, wiping from front to back.
4.3 Clean the Diaper Area
This is one of the most important parts of your diaper changing checklist. Clean skin helps prevent rashes and infections.
- For girls: Always wipe from front to back to avoid spreading bacteria.
- For boys: Clean under and around the testicles and penis. Be gentle. If your baby is uncircumcised, follow your doctor’s guidance.
- For all babies: Make sure to clean the folds of the thighs, buttocks, and any hidden creases.
Use as many wipes as you need. You can fold each wipe to use a clean area each time. For very messy diapers, you may use several wipes. That is normal.
4.4 Remove the Dirty Diaper
- Slide the dirty diaper out from under your baby while holding their legs up gently.
- Fold the dirty diaper in on itself, using the tabs to seal it into a tight bundle.
- Place it in your diaper pail, trash can, or diaper bag right away.
4.5 Let the Skin Air Dry (If Possible)
If you have a moment and your baby is calm, let the diaper area air dry for 30–60 seconds. You can gently fan with your hand or pat dry with a soft cloth. Dry skin helps reduce rashes and irritation.
4.6 Apply Cream or Ointment
- Use a clean finger or a small spatula to apply a thin layer of barrier cream.
- Cover any red or irritated areas well.
- If your baby already has a rash, use the cream your pediatrician recommends.
Adding this step to your diaper changing checklist can prevent many future problems. It takes just a few seconds and protects the skin from moisture in the disposable diaper.
4.7 Place the Clean Disposable Diaper Under Baby
- Open the clean diaper and pull the back half (with the tabs) under your baby’s bottom.
- The top of the back should be around your baby’s waistline.
- For newborns, fold the front down below the belly button stump or use diapers with a cutout.
4.8 Fasten the Diaper Correctly
- Pull the front of the diaper up between baby’s legs.
- Make sure it lies flat and smooth across the belly.
- Fasten one tab at a time, angling them slightly downward for a snug fit.
- Check that the waistband is even in the front and back.
Do not fasten the diaper too tight. You should be able to slide two fingers between the diaper and baby’s tummy. But it should not be so loose that it gaps or sags.
4.9 Adjust the Leg Cuffs
A simple but often missed step in the diaper changing checklist is checking the leg cuffs.
- Gently run a finger around each leg opening.
- Make sure the soft ruffles are pulled out, not tucked in.
- This helps stop leaks and blowouts.
4.10 Dress Baby and Clean Up
- Put baby’s clothes back on. If they are wet or dirty, change into a fresh outfit.
- Wipe down your changing pad if needed.
- Place used wipes in the trash or diaper pail.
- Wash or sanitize your hands after the diaper change.
Step 5: Special Situations on Your Diaper Changing Checklist
Not every diaper change is the same. Here are a few special cases to add to your diaper changing checklist so you feel prepared.
5.1 Newborn Diapers and Umbilical Cord Care
With newborns, the umbilical cord stump needs extra care.
- Use newborn disposable diapers with a cutout for the cord or fold the front of the diaper down.
- Keep the area clean and dry.
- Do not apply lotions or creams to the stump unless your doctor says so.
5.2 Diaper Changes for Baby Boys
- Place a wipe or cloth loosely over the penis during the change. This helps avoid surprise sprays.
- Always point the penis down before closing the diaper to reduce leaks.
5.3 Diaper Changes for Baby Girls
- Always wipe front to back to prevent infections.
- Gently clean between the labia folds, but do not scrub.
5.4 Nighttime Diaper Changes
At night, your diaper changing checklist may be shorter because you want baby back to sleep quickly.
- Use extra-absorbent disposable diapers for nighttime.
- Keep the lights dim and your voice soft.
- Change only when needed (very full diaper or poop).
- Have everything ready before you pick up baby.
Step 6: Travel and On-the-Go Diaper Changing Checklist
Diaper changes away from home can feel stressful. A simple travel diaper changing checklist makes outings much easier.
6.1 Pack a Diaper Bag Kit
Here is what to keep in your diaper bag at all times:
- 6–8 disposable diapers (more for newborns or long trips)
- Travel pack of wipes
- Portable changing pad
- Diaper cream in a small tube
- Disposable diaper bags (for dirty diapers and messy clothes)
- 2 extra outfits (onesie and pants)
- Extra socks
- Hand sanitizer
- A small toy or pacifier for distraction
6.2 Changing Diapers in Public Restrooms
- Use the changing table if available. Wipe it down if you can.
- Always place your own changing pad or blanket down first.
- Keep one hand on baby at all times, as public tables can be slippery.
- Seal dirty disposable diapers in a bag before tossing them.
6.3 Car and Outdoor Diaper Changes
- Use the car trunk or back seat as a flat surface.
- Lay down your portable changing pad.
- Keep a small “emergency kit” in the car with extra disposable diapers, wipes, and clothes.
Step 7: Preventing Diaper Rash and Leaks
A smart diaper changing checklist is not just about the steps. It also helps you prevent common problems like rashes and leaks.
7.1 Diaper Rash Prevention Checklist
- Change diapers often. Do not let your baby sit in a wet or dirty diaper for long.
- Clean gently every time, even with just a wet diaper.
- Let the skin dry before putting on a new disposable diaper.
- Use a thin layer of barrier cream at most changes.
- Give baby some “diaper-free” time on a towel or mat.
7.2 Leak and Blowout Prevention Checklist
- Use the right size disposable diaper.
- Make sure the diaper is snug but not too tight.
- Check that leg cuffs are pulled out, not tucked in.
- Point baby boys’ penis downward in the diaper.
- For heavy wetters, try a more absorbent or overnight diaper.
Troubleshooting Common Diaper Changing Problems
Even with a perfect diaper changing checklist, things can still go wrong. Here is how to handle some common issues.
Problem 1: Constant Leaks
If you are dealing with leaks often, try this:
- Check if the diaper size is correct. You may need to size up.
- Make sure the diaper is not too loose around the legs and waist.
- Try a different brand of disposable diaper. Some fit certain body shapes better.
Problem 2: Frequent Blowouts
- Size up if poop is escaping up the back often.
- Ensure the waistband is high enough on the back.
- Double-check that the diaper is on straight and snug.
Problem 3: Persistent Diaper Rash
- Change diapers more often.
- Give more diaper-free time each day.
- Use a thicker layer of rash cream at each change.
- Switch to more gentle wipes or plain water and cloths.
- If rash lasts more than a few days or looks severe, call your pediatrician.
Problem 4: Baby Fights Diaper Changes
- Use distraction: songs, toys, or a mobile near the diaper changing station.
- Talk or narrate what you are doing in a calm voice.
- Keep changes quick and gentle.
- Let older babies hold a wipe or clean diaper to “help.”
Sample Diaper Changing Checklist You Can Use Today
Here is a simple diaper changing checklist you can print, save, or copy to your phone:
- Wash or sanitize hands.
- Gather supplies: disposable diaper, wipes, cream, bag or trash.
- Lay baby on changing pad and secure safely.
- Open dirty diaper and wipe away excess mess with front of diaper.
- Lift baby’s legs and clean from front to back with wipes.
- Remove dirty diaper and dispose of it.
- Let skin air dry for a few seconds.
- Apply a thin layer of barrier cream.
- Place clean disposable diaper under baby.
- Pull front up and fasten tabs snugly.
- Check waistband and leg cuffs for gaps.
- Dress baby and give a cuddle or smile.
- Clean the changing area if needed.
- Wash or sanitize your hands again.
Conclusion: Make Diaper Changes Calm and Stress Free
Diaper changing does not have to be a frantic, messy rush. With a clear diaper changing checklist and a bit of practice, you can turn each change into a simple, calm routine. Your baby will feel more comfortable, and you will feel more confident.
Focus on three main ideas: prepare your space, follow the same steps each time, and keep your supplies ready. Over time, using disposable diapers will feel quick and easy. You will handle leaks, rashes, and travel changes without panic. Keep this guide handy, adjust the diaper changing checklist to fit your family, and enjoy the peace of mind that comes with being prepared.
🎥 Related Video: Diaper changing hacks for new parents
📺 Taking Cara Babies
Here are more diaper changing tips: ➡️ Use a disposable pad for a quick clean up. ➡️ No diaper warmer? Hold the …