When to stop sterilizing baby bottles depends on age, health, and feeding method. This guide helps parents decide the right time and shows safe steps to move from sterilizing to simple cleaning.
Key Takeaways
- When to stop sterilizing baby bottles: Most healthy, full-term babies can stop strict sterilizing after 6 months, but check with your pediatrician.
- Age matters: The 0–3 month period is highest risk; by 6–12 months, the immune system is stronger.
- Keep cleaning: Regular dishwashing with hot soapy water or a dishwasher is still essential after you stop sterilizing.
- Special cases: Premature babies or immune-compromised infants may need longer sterilizing routines.
- Safe methods: Boiling, steam, and microwave sterilizers are effective choices while sterilizing is needed.
- Practical transition: Gradually reduce sterile steps and watch for signs of illness or infection.
Introduction
This guide explains when to stop sterilizing baby bottles. You will learn when sterilizing is most important. You will learn safe ways to stop. You will learn cleaning tips. You will also get troubleshooting help.
Why sterilize baby bottles at all?
Sterilizing kills germs. It lowers the risk of infections. Newborns have weaker immune systems. They are more likely to get sick. Sterilizing helps protect them. It is a common and helpful practice. But it is not forever.
Visual guide about When to Stop Sterilizing Baby Bottles Advice for Parents
Image source: cdn.shopify.com
General timeline: when to stop sterilizing baby bottles
Below is a simple timeline. Use it as a guide. Check with your pediatrician for personal advice.
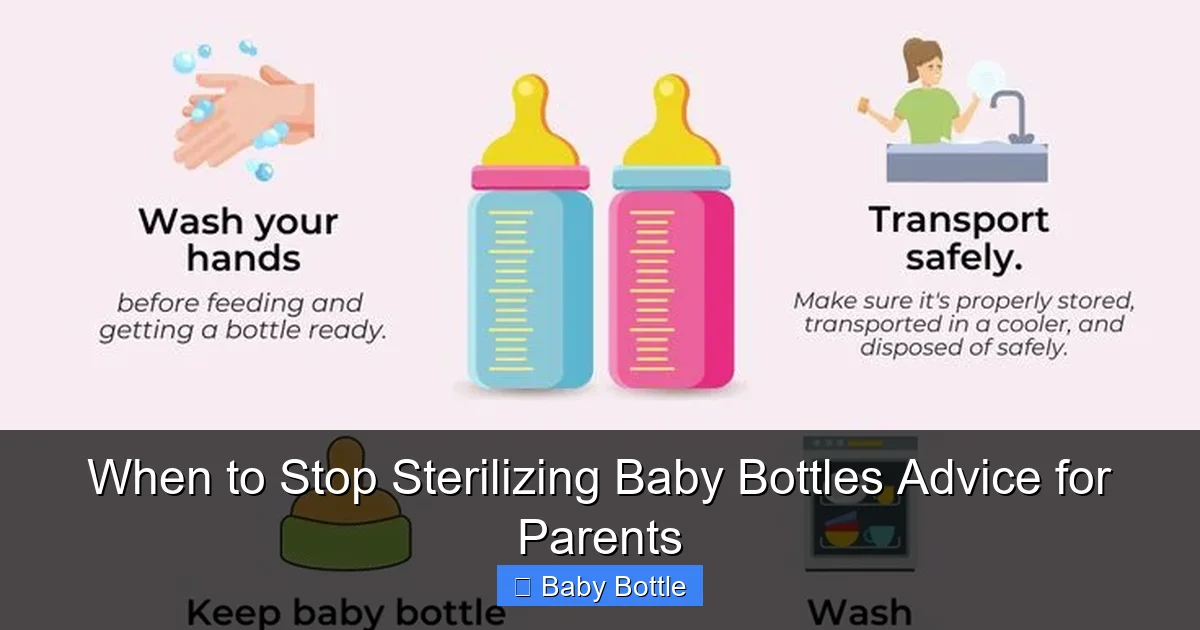
Visual guide about When to Stop Sterilizing Baby Bottles Advice for Parents
Image source: i.pinimg.com
0–3 months: Sterilize regularly
In the first three months, many experts recommend sterilizing. This is the highest risk window. Clean and sterilize bottles after each use. This helps protect the baby from harmful germs.
3–6 months: Consider continuing sterilization
Between three and six months, you can start to reduce sterilizing. Many parents continue daily sterilizing. Others sterilize less often. If your baby was born early or is unwell, keep sterilizing.
6–12 months: Often safe to stop regular sterilizing
By six months, many babies have stronger immune systems. Many parents stop strict sterilizing then. You can move to hot soapy water or dishwasher cleaning. Keep washing parts well.
12 months and beyond: Sterilizing usually not needed
After a year, regular sterilizing is usually not needed for healthy, full-term babies. Normal kitchen cleaning is fine. Still wash bottles and nipples thoroughly after each use.
Factors that change the timeline
Not all babies are the same. These factors can change when to stop sterilizing baby bottles.
Visual guide about When to Stop Sterilizing Baby Bottles Advice for Parents
Image source: i.ytimg.com
Premature birth
Premature babies may need longer sterilizing. Their immune systems are not fully ready. Ask the baby’s doctor for a plan.
Health conditions
Babies with health issues may need ongoing sterilizing. This includes immune problems or serious illnesses. Follow medical advice closely.
Feeding method
Breastfeeding lowers some risks. But pumped milk and formula still need clean bottles. Feeding method may affect when you stop sterilizing.
Local health risks
Some areas have higher infection or contamination risks. This can affect your decision on when to stop sterilizing baby bottles. Ask local health providers if you are unsure.
How to sterilize bottles: quick refresher
If you still need to sterilize, here are common methods. They are all effective when done correctly. Use the one that fits your life.
Boiling
- Fill a large pot with water.
- Place disassembled bottles and parts in the pot.
- Bring to a rolling boil for 5 minutes.
- Use clean tongs to remove items.
- Let air dry on a clean surface.
Steam sterilizers
- Follow the manufacturer’s instructions.
- Place clean bottles and parts inside.
- Run the cycle and let items cool before use.
Microwave sterilizers
- Many microwave sterilizers are fast and easy.
- Use with the correct water amount and timing.
- Let items cool before removing.
Sterilizing tablets or solutions
- Dissolve tablets in water as directed.
- Soak parts for the recommended time.
- Rinse with boiled or cooled water if required.
Step-by-step: How to decide when to stop sterilizing baby bottles
Use this step-by-step plan. It will help you choose the right time to stop sterilizing. The steps are simple and clear.
Step 1: Check your baby’s health
Talk to your pediatrician. Ask about infections and immune health. Ask about prematurity or special needs. Get clear advice for your baby.
Step 2: Track age milestones
Note your baby’s age. Use the 0–3, 3–6, 6–12 month guide. Consider your baby’s development. Many parents stop by six months if the baby is healthy.
Step 3: Look at feeding habits
Are you using formula? Pumped milk? Both? These require clean bottles. Decide if you are ready to switch to dishwashing only. The type of feeding can affect your choice.
Step 4: Evaluate your home environment
Consider water safety. Consider cleanliness. If tap water is not safe, you may need more caution. Use bottled or boiled water if needed.
Step 5: Try a gradual transition
Start by sterilizing less often. For example, sterilize every other day. Or sterilize only once daily. See how your baby does for a week or two.
Step 6: Watch your baby closely
Look for signs of tummy trouble. Watch for fevers or rashes. If you see problems, return to sterilizing and call the doctor.
How to clean bottles after you stop sterilizing
Stopping sterilizing does not mean slacking on cleaning. Clean bottles well every time.
Daily cleaning steps
- Rinse bottles and nipples right after use.
- Use hot, soapy water and a bottle brush.
- Scrub all parts thoroughly.
- Rinse well with clean water.
- Air dry on a clean rack.
Using a dishwasher
Place bottles and parts on the top rack. Use a hot water cycle. Many dishwashers sanitize. Check dishwasher settings and manuals.
When to deep clean
Deep clean once daily or every few uses. Boil or use a steam cycle if you feel unsure. Deep clean if your baby is sick.
Practical tips and examples
Here are simple tips you can use now. They help ease the switch and keep baby safe.
- Tip: Use a bottle brush with a small head. It reaches the corners better.
- Tip: Replace nipples every 2–3 months or if they crack.
- Example: If baby is 7 months and healthy, try dishwasher cleaning for a week. If all is well, stop sterilizing.
- Tip: Keep bottles and nipples in a clean cabinet. Avoid open-air dust.
- Tip: Wash your hands before handling clean bottles.
What to do if your baby gets sick after stopping sterilizing
If your baby becomes ill after you stop sterilizing, act quickly. Here are steps to follow.
Step 1: Contact your pediatrician
Call the doctor right away. Describe symptoms in detail. Follow their instructions.
Step 2: Resume sterilizing
Return to your prior sterilizing routine. Sterilize bottles and nipples after each use. This can reduce further risks.
Step 3: Check bottle care
Ensure you are cleaning bottles properly. Replace damaged parts. Use clean water to rinse.
Step 4: Monitor closely
Watch for improvement. Keep notes on feedings and symptoms. Share these with the pediatrician.
Troubleshooting: Common concerns
Here are answers to common worries about when to stop sterilizing baby bottles.
Concern: My baby has diarrhea after I stopped
Diarrhea can be a sign of infection. Stop sterilizing and call your pediatrician. Use boiled water for cleaning until you get advice.
Concern: I worry about germs in the dishwasher
Use the hottest setting and a heated dry cycle. Place bottles on the top rack. If unsure, hand-wash with hot soapy water.
Concern: My baby has allergies
Allergies do not usually mean you must sterilize. But if your child is at high risk or has other conditions, ask the doctor.
Concern: How to keep nipples clean in a busy household
Store clean nipples in a sealed container. Label them for feeding times. Replace frequently to avoid wear and tear.
Special situations
Some families have special needs. These notes can help.
Traveling
When traveling, you may not have sterilizing tools. Use bottled water to rinse. Carry extra clean bottles. Use single-use sterilizing wipes or tablets.
Daycare
Ask the daycare about their bottle cleaning rules. Provide clear instructions. Bring labeled bottles and nipples.
Multiple babies
With twins, sterilizing may feel harder. Do a batch sterilize once per day. Keep extra bottles to rotate during the day.
Products and tools that help
Many tools make cleaning easy. They also make the transition smoother.
- Electric steam sterilizers — fast and easy.
- Microwave sterilizer bags — for quick sterilizing on the go.
- Bottle brushes — with small heads and nipple brushes.
- Dishwasher baskets — to keep small parts from falling.
- Sanitizing dishwasher setting — if available.
How often to replace bottles and nipples
Even after you stop sterilizing, replace parts on a schedule. Old parts can harbor bacteria.
- Replace nipples every 2–3 months.
- Replace bottles that are scratched or discolored.
- Replace plastic bottles if they show wear.
- Consider glass bottles if you want longer-lasting parts.
Signs you may need to restart sterilizing
Watch for these signs. They mean you should go back to sterilizing for a while.
- Recurrent fevers or infections.
- Persistent diarrhea or vomiting.
- Recent illness in the household.
- Concerns about water quality.
Conclusion
Deciding when to stop sterilizing baby bottles is personal. Use age, health, and feeding needs to guide you. Most healthy babies can stop strict sterilizing by six months. Others may need longer. Always talk to your pediatrician. Keep cleaning bottles well. Watch your baby for signs of illness. With care, you can make a safe switch from sterilizing to regular cleaning.
🎥 Related Video: To Sterilize Baby Bottles Or Not
📺 Kids Health By Dr. Tahir
Lots of parents ask me about the need to sterilize baby bottles. Here I will talk to you about that and if you need to sterilize the …
